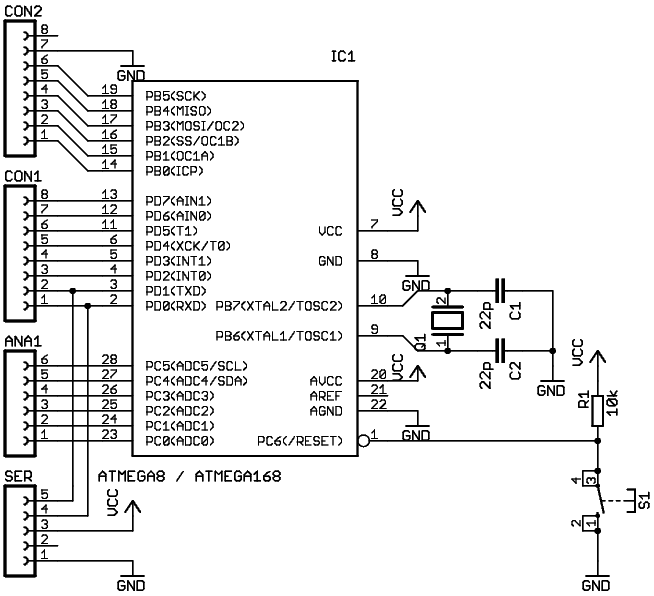
Schematic of the reduced Arduino Board (click to enlarge)
When starting with Arduino, one soon has much more Arduino boards then RS232 or even USB ports on the computer. So that, it seems more useful to put the signal level converter to an external adapter than directly on the Arduino board.

Usually, one has (I have) a big basket full of ATMEGA8 and ATMEGA168 with Arduino bootloaders and one idea. So I need a simple and fast-to-build Arduino board. When the bootloader is already programmed, one does not need the ISP port. Also, I prefer an external RS232 level converter than to build it on the Arduino board, since then the usage is more flexible.
When removing these from the board itself, the partlist becomes very short:
| 1 | ATMEGA 8 or 168 with Arduino bootloader |
| 1 | Crystal 16MHz |
| 1 | Capacitor 100nF |
| 2 | Capacitors 22pF |
| 1 | Resistor 10k |
| 1 | Pushbutton |
| 1 | Connector |
For references, see [1].
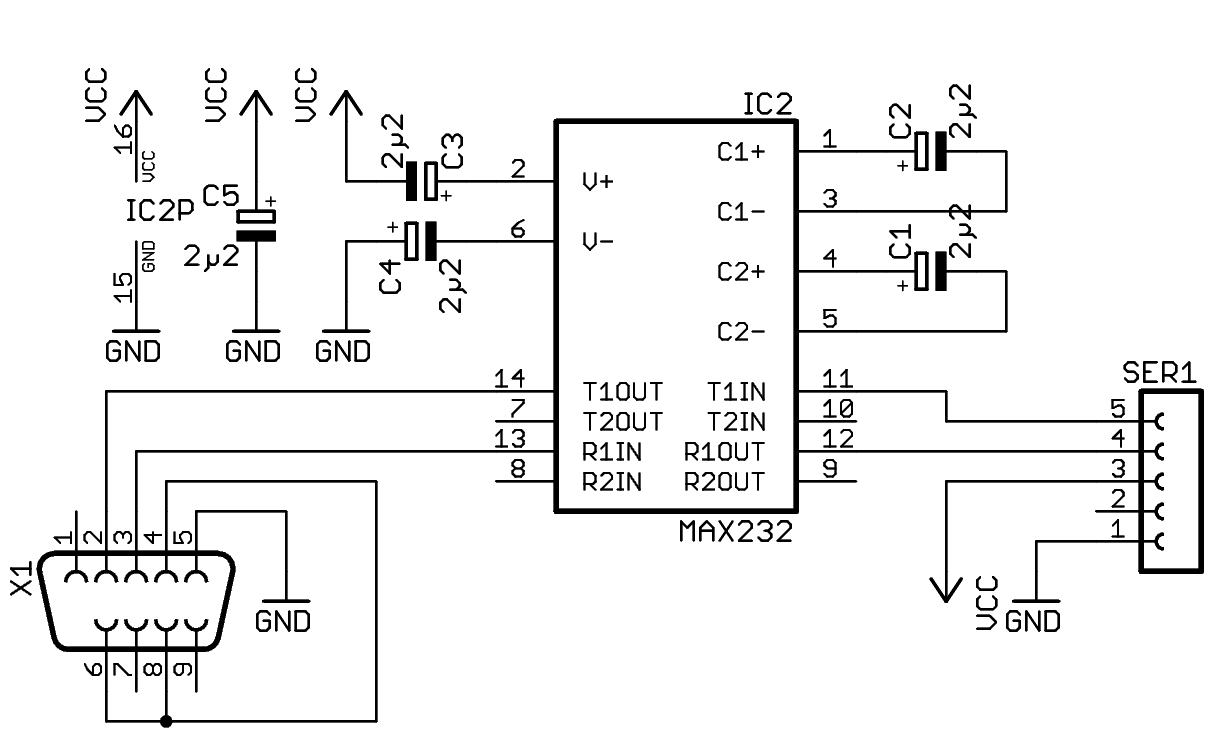

The converter from TTL to RS232 signal level is a simple application of a MAX232 and fits inside a connector's housing.


The idea came from [2] where a CAT-cable for a Sagem mobile was used as CAT cable for a ham radio transceiver.
When connected to a PC via CAT, many mobile phone use a serial protocol and TTL signal levels. At many of these CAT adapters, the connexion to the operating system is done with a virtual COM-port. So we may have exactly the thing we want for our Arduino: A COM-port with TTL signal levels via USB.
CAT-cable for the following cellphones have been tested:
One can get those cables for about 5 Euros. The important thing is that the drivers provide a COM-port.
The first step should be the installation of the COM driver. When opening, one needs a way to find the meaning of the connectors. One possibility is to look out for a scheme of the connector and mark the wires. Another, maybe faster, way is to identify the pins by oneself:
 void setup()

 {

 Serial.begin(9600);

 Serial.println("Setup ready");

 }


 void loop()

 {

 Serial.println("Loop");

 delay(500);

 }
If you want to power the Arduino via USB, you probably have to connect the USB ground to the TTL ground.